Field briefing
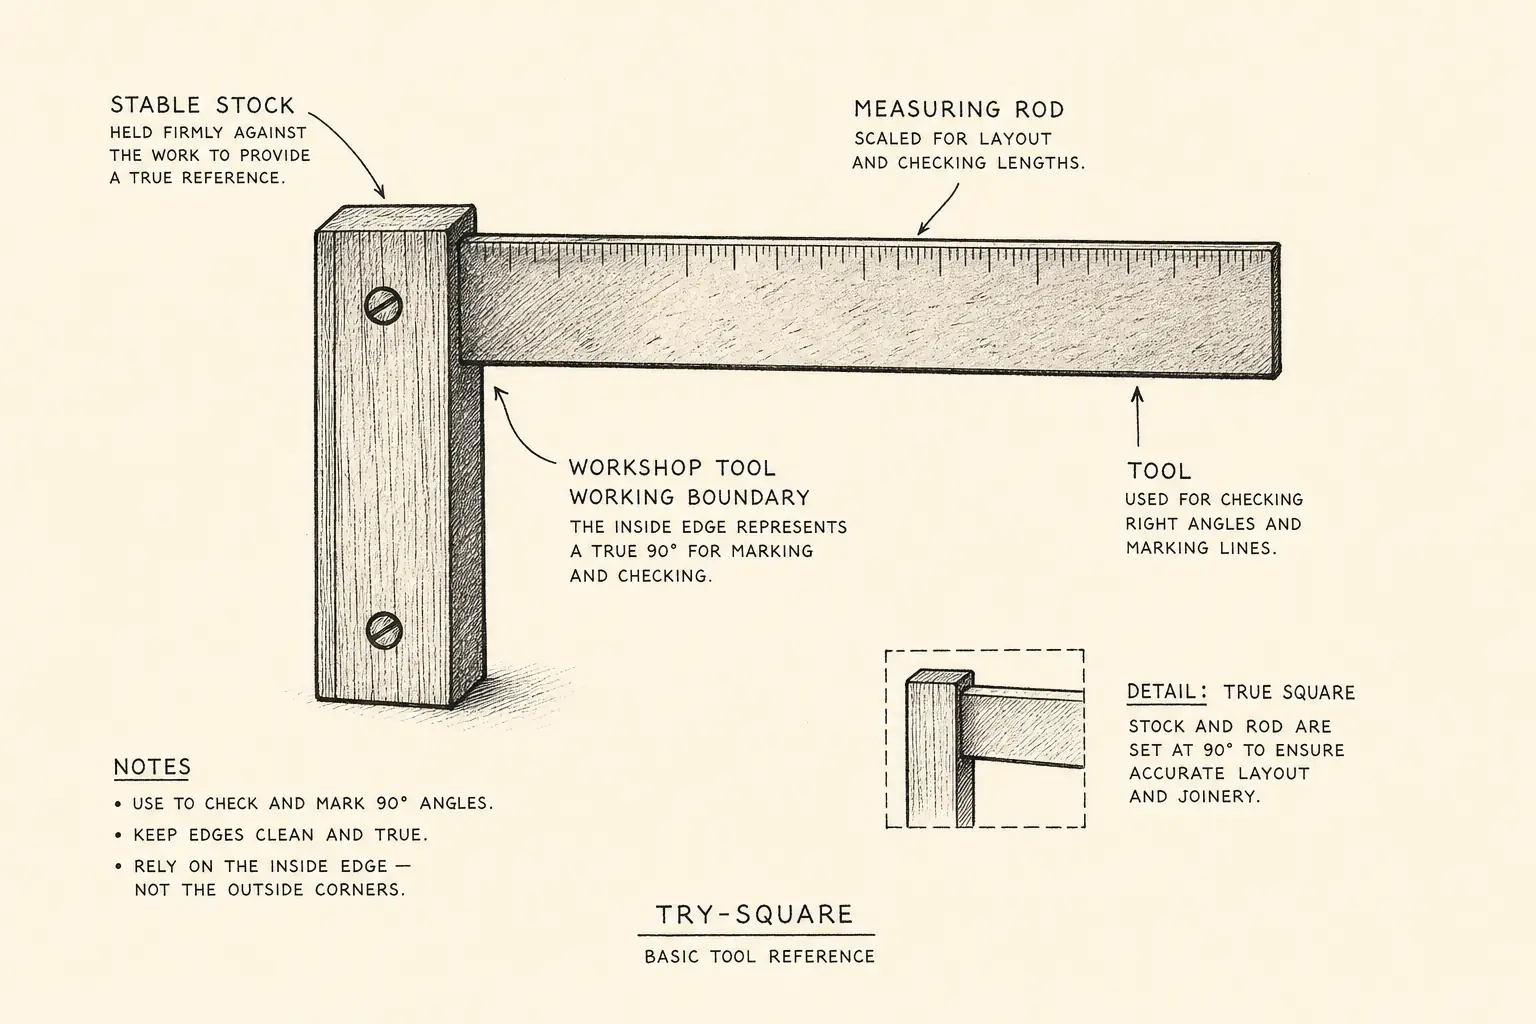
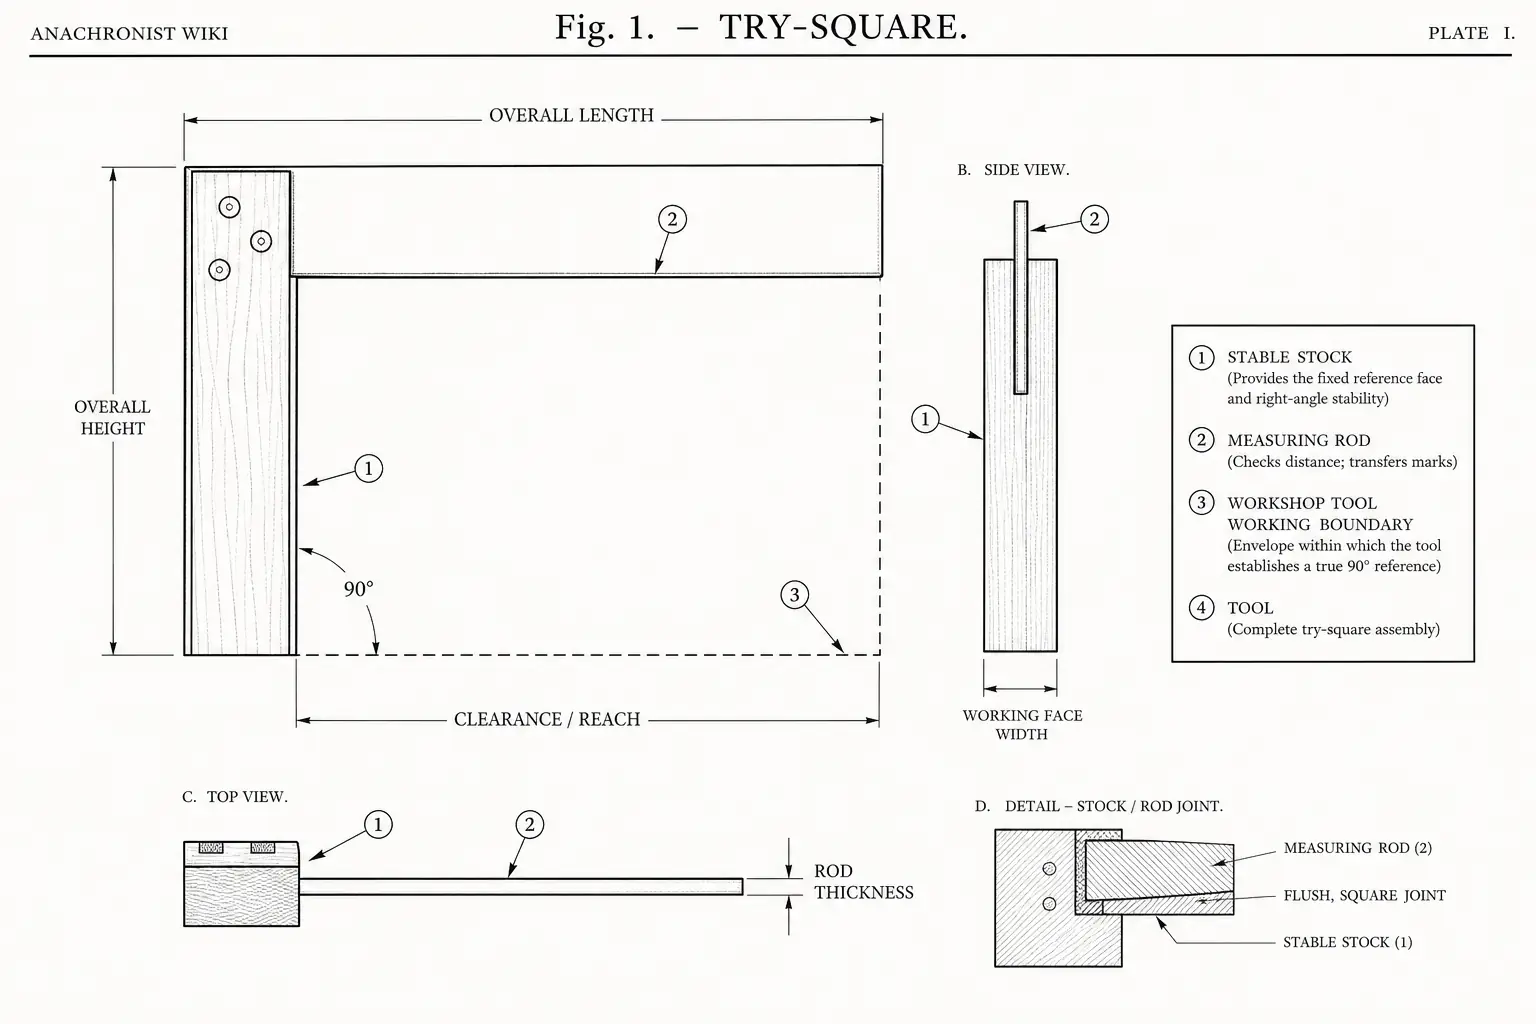
A try-square is a right-angle reference. It lets woodworking move from “looks straight” to repeatable frames, boxes, benches, axles, and templates.
What you are trying to make
Make a rigid tool with one trustworthy inside or outside corner, then protect and check that corner.
Minimum viable version
A basic square is two straight pieces fixed at a right angle and checked by flipping it against a marked line.
Better versions
Better versions use stable seasoned stock, pinned or shouldered joints, wear-resistant edges, and a master square kept for checking working squares.
Prerequisite tree
- Measuring rod for layout.
- Cutting edge and abrasive grit for reference surfaces.
- Technical drawing once squares are used in templates.
Materials and sourcing
Source straight stable wood, bone, antler, stone, or metal. Recognition focuses on straight edges, low warp, and surfaces that can be checked by reversal.
Acquisition is part material and part trust. The first square may be made from geometry, a known frame, or repeated reversal checks. Preparation includes smoothing, joining, marking a protected reference face, and keeping the tool dry. Substitutes include cord geometry, plumb lines, diagonal checks, and templates.
Tools and workshop requirements
Useful tools are a measuring rod, marking point, cutting edge, abrasive grit, pegs or lashings, and a flat board or wall for checking.
Procedure
- Make two straight reference arms.
- Join them firmly.
- Mark a test line with the square.
- Flip the square and compare against the same line.
- Adjust or reject if the error doubles visibly.
- Store the square as a measuring tool, not a pry bar.
Verification and quality control
The flip test is the core check. A good square gives the same line after reversal and stays consistent after ordinary shop handling.
Sources and provenance
Generated expansion for ANA-37. No source pack was used; specific historical and technical claims need human source review.